|
Standard Printing Commands - Email & Fax |

  
|
|
Standard Printing Commands - Email & Fax |
|
If you have checked the Allow Prt to Email + Fax option (User Options page) in Set Configuration then, when the printing process starts a different screen will be displayed:
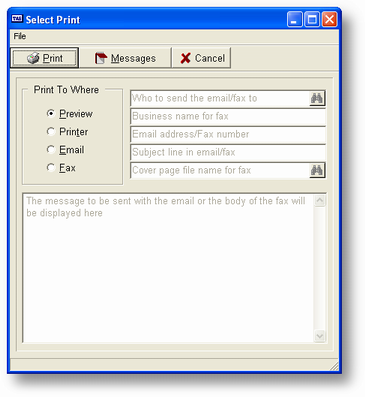
This screen allows you to choose 4 different options, Preview, Printer, Email and Fax.
Choose the appropriate output by either clicking on the radio button that applies, or entering ALT+the underlined character. For example, you would enter ALT+T for Printer, or ALT+E for email. The Preview option is the default value.
If you choose Email or Fax you will also be able to enter the other options:
![]()
This is the name of the person you're sending the email or fax to. If you click on the ellipsis button or press the F2 key you will get a list of contacts. You can choose the appropriate contact and the balance of the information will be filled out for you.
![]()
If you are sending a fax then you may enter the business name here. If you have chosen a contact above the business name from that record will be inserted here automatically.
![]()
If you are going to send an email then this must be the user's email address. If you are going to send a fax then this should be the fax number.
![]()
This will go in the subject line for either the email or fax.
![]()
If this is a fax only you may choose from a list of .CVP files (standard WinFax Pro cover pages) that have been previously created. If you do not choose a cover page file then a default page will be created for you. For more information about CVP files please refer to your WinFax Pro documentation.
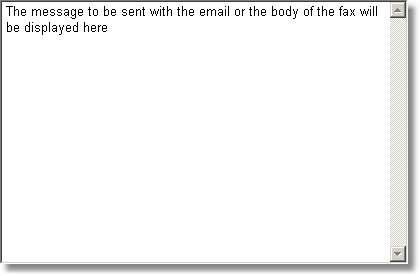
You may add a message here or choose from a list of messages previously entered by pressing the @F2 (Alt+F2) key.
General Program Operation
When the initial screen is displayed, if you just want to preview the report, then just press the ENTER key and the printing process will continue.
If you want to sent to the printer then click on the printer radio button, or press the @T (Alt+T) key. Then, press the F10 key and the printing process will continue.
If you want the report to be attached to an email or sent as a fax, click on the appropriate radio button. Then, either tab to the name field or press the F2 key which will display a list of contacts. Either choose the appropriate contact or enter the name directly.
If you choose a contact the appropriate email address or fax number will be filled in. If you don't, you must do this yourself.
Enter the Subject line, if desired. And, it this is a fax, you may choose an existing CVP file for the cover page.
The last step is to enter the body message, if any. You may enter this directly in the memo field or press the @F2 (Alt+F2) key to get a list of messages previously entered (see below for more information).
When you are finished, press the F10 key and the printing process will continue.
Sending an Email
If you are sending an email, when the process is complete the following screen will be displayed:
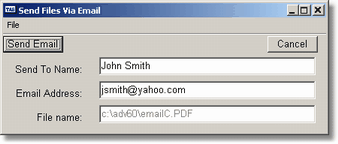
Press the ENTER key to send the message or you may change the Name or Email address here, then click on the Send Email button.
When the email has been sent the screen above will be displayed. If there is an error in sending the email, for example, you haven't setup your email settings yet, a dialog box alerting you to this will be displayed instead.
Sending a Fax
![]() *** IMPORTANT *** Advanced Accounting 7 uses WinFax Pro from Symantec (www.symantec.com) to send faxes. This eliminates much of the overhead in setting up your telephone lines properly, and WinFax Pro has all of the options already included to create a client/server setup. However, we make no attempt to cover installation of WinFax Pro. You should refer to the Symantec site for more information. If you have any questions about this please don't hesitate to contact us. (WinFax is a trademark of Symantec.)
*** IMPORTANT *** Advanced Accounting 7 uses WinFax Pro from Symantec (www.symantec.com) to send faxes. This eliminates much of the overhead in setting up your telephone lines properly, and WinFax Pro has all of the options already included to create a client/server setup. However, we make no attempt to cover installation of WinFax Pro. You should refer to the Symantec site for more information. If you have any questions about this please don't hesitate to contact us. (WinFax is a trademark of Symantec.)
If you are sending a fax, when the printing process is complete the following screen will be displayed:
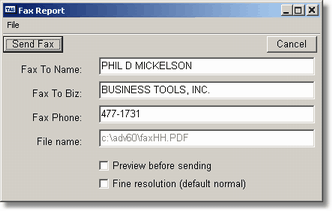
You may still change the name, business name, or phone number before sending the fax. You have the option to preview the fax before it's sent (check the Preview before sending box) and you may specify high resolution (takes a little longer to send and receive the fax - check the Fine resolution box). Click on the Send Fax button or press the F10 key to complete the process.
![]() The program uses Adobe Acrobat to convert the report into a format that WinFax can use. You should have a copy of Adobe Acrobat on your computer normally, however, if you don't it can be downloaded for free from http://www.adobe.com/products/acrobat/readstep2.html. A new window will be opened with Acrobat active. Press the ENTER key to display that window, then either click on the close button at the upper right corner or press the ^Q (CTRL+Q) to close the window.
The program uses Adobe Acrobat to convert the report into a format that WinFax can use. You should have a copy of Adobe Acrobat on your computer normally, however, if you don't it can be downloaded for free from http://www.adobe.com/products/acrobat/readstep2.html. A new window will be opened with Acrobat active. Press the ENTER key to display that window, then either click on the close button at the upper right corner or press the ^Q (CTRL+Q) to close the window.
When the fax has been sent the dialog box above will be displayed. If there is an error sending the fax a dialog box alerting you to this will be displayed instead.
![]() The fax is added to the Outbox for WinFax and can be manipulated just like any other fax sent through the software. It will also be added to the Send Log automatically.
The fax is added to the Outbox for WinFax and can be manipulated just like any other fax sent through the software. It will also be added to the Send Log automatically.
Adding Messages for Later Use
You may add messages to the notes file to be used when you send an email or fax. Click on the Messages button and the following screen will be displayed:
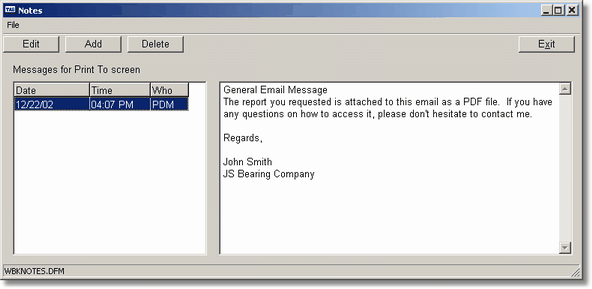
This is the standard TASNotes program and for further information on entering or displaying notes please see TASNotes.
![]() If you should want to print out the messages entered here see UT-E - TASNotes Reports and choose PT in the For Application field.
If you should want to print out the messages entered here see UT-E - TASNotes Reports and choose PT in the For Application field.
Page url: http://www.cassoftware.com.com/adv7docs/index.html?standardprintingcommands_e.htm