|
TTASForm |

  
|
|
TTASForm |
|
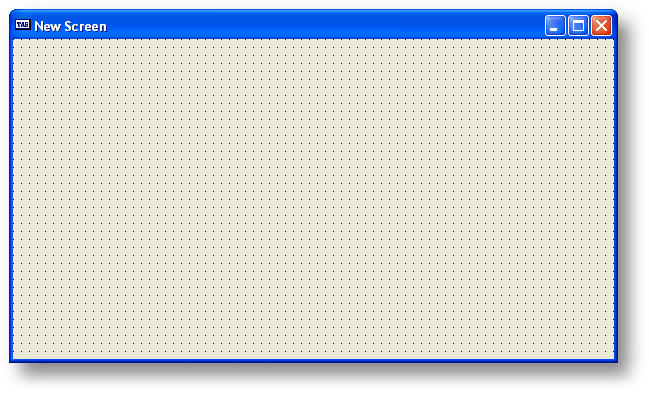
This object is created automatically when you choose the New option in the screen editor. All other objects must be placed on a TTASForm.
PROPERTIES
The following are the properties that apply to this object. Some are defined in Common Properties and are linked to their appropriate page.
Appearance
| Caption | This is the text that is displayed at the top of the form. This property can be modified during runtime. |
Behavior
Font
Hint
| Hint | In the TTASForm this has a special use. It keeps track of the name of the form during the editing process. Do not change this property while editing a form. |
Misc
| Name | NOTE: Regardless what you put in this property the form is named something different depending on when it's loaded in your program. You must use the GET_FORM_NAME() function during runtime to get the correct Name property for this form. |
| Tag | NOTE: When the form is being edited this value is set to -1. Do not change this value. |
Other
| ActiveControl | This is the object that will have control when the form is loaded. This is generally set by the Tab Order (see Tab Order Property Editor) but you can override that and specify an object here. To get a list of the object available, click on the drop down arrow. |
| AlphaBlend | Specifies whether the form is translucent. Set AlphaBlend to specify that the form represents a layered window that allows a translucent color. The AlphaBlendValue property specifies the degree of translucency. |
NOTE: AlphaBlend does not work on all systems. The application must be running under Windows 2000 or better,and the machine must be a P90 or better.
AlphaBlendValue Specifies the degree of translucency on a translucent form. Set AlphaBlendValue to a value between 0 and 255 to indicate the degree of translucency when the AlphaBlend property is true. A value of 0 indicates a completely transparent window. A value of 255 indicates complete opacity.
NOTE: AlphaBlendValue only has an effect when the AlphaBlend property is true.
TransparentColor Specifies whether a color on the form appears transparent. Use TransparentColor to indicate that one of the colors on the form should be treated as transparent, allowing windows behind the form to completely show through. The TransparentColorValue property indicates the color that appears completely transparent.
NOTE: To make the entire form transparent, or to make it translucent rather than transparent, use the AlphaBlend and AlphaBlendValue properties.
NOTE: TransparentColor does not work on all systems. The application must be running under Windows 2000 or better, with adequate hardware.
| ScreenSnap | Specifies whether form snaps to edge of screen. ScreenSnap determines whether the edges of the form snap to the edge of the screen when the user moves the form. To control the snap distance, set the SnapBuffer property. |
| SnapBuffer | Specifies distance for screen snap. If ScreenSnap is true, SnapBuffer determines the maximum number of pixels that be between the form edge and the screen edge before the form snaps to the screen edge. |
| AutoResize | If AutoResize is checked the user when they make the form larger or smaller will atempt to resize all the components on the screen re sizing the screen. NOTE: Because of the calculations for this are very complex and rounding ocures the user may adjust the screen so that it is unusable. |
NOTE : This feature was implemented for one of our customer as a feature they wanted TASPRO to have it is our recommendation not to use this feature as we felt it was unneeded in most cases but if you just have to have re sizable form it is supported with this property.
| AutoResizeMinHeight | This is the minimum height that the user will be allowed to resize there form when AutoResize is checked. NOTE: this was placed here to try to protect the user from making the form unusable. If this value is set to 0 the minimum height will be set to 1/3 the original size the programmer made there form. |
| AutoResizeMinWidth | This is the minimum width that the user will be allowed to resize there form when AutoResize is checked. NOTE: this was placed here to try to protect the user from making the screen unusable. If this value is set to 0 the minimum width will be set to 1/3 the original size the programmer made there screen. |
| AutoScroll | If this property is checked (set to .True.) scroll bars will be displayed automatically if the size of the window is too small to accommodate all of the objects on it. The default value is checked. |
| BorderIcons | This property controls which icons appear in the caption bar of the form. The options are: biMaximize (allow the user to maximize the size of the form at runtime), biMinimize (allow the user to minimize the size of the form at runtime) and biSystemMenu (which puts both the menu that will appear if the user clicks on the icon at the left side of the window and the X on the right side of the window). The default value is all three options are checked (set to .True.). |
NOTE: If you don't check at least the biSystemMenu option you MUST give the user another way of exiting out of the form (a button, etc.). If you don't they'll be stuck and the only option will be CTRL-ALT-DEL.
| BorderStyle | This property determines how or if the user can resize the form and which BorderIcons are available (regardless of what you choose in the BorderIcons property). The options are: bsDialog (form cannot be resized at all and only the Close icon is displayed), bsNone (no border is displayed, the form cannot be resized, and no BorderIcons are displayed), bsSingle (a narrow border is displayed around the form, the user is not able to resize the form by stretching the sides, all of the BorderIcons chosen are displayed), bsSizeable (standard resize border, all BorderIcons are displayed, default value), bsSizeToolWin (narrow caption bar, only Close icon is displayed, user is able to resize the form by stretching the sides) and bsToolWin (only Close icon is displayed, user cannot resize form at all). |
| ClientHeight | The height of the inside portion of the form, in pixels. This is the vertical space in which you can put other objects. |
| ClientWidth | The width of the inside portion of the form, in pixels. This is the horizontal space in which you can put other objects. |
| HelpFile | The name and path of the file to be used as the help file for this form. If you use the HelpContext values in objects you place on this form it will look at this file for the correct pages. |
| HorzScrollBar | These options specify what the horizontal scroll bar will look and act like if you have checked the AutoScroll property above. |
| Icon | This is the .ICO file image that will be used in the upper left corner of the form. The default value is the standard TAS Professional icon. |
| Menu | You can specify which TMainMenu will be used as the Main Menu for this form by placing the name of the object here. When you put a TMainMenu object on the form its name is automatically put in this property. |
| VertScrollBar | These options specify what the vertical scroll bar will look and act like if you have checked the AutoScroll property above |
| WindowState | This determines how the form will appear to the user. The options are: wsNormal - The form will be displayed the same size you have designed it. wsMaximized - The form will grow to take up the entire available screen space. In this option the user will not be able to resize the form, generally used in menu type forms. wsMinimized - Will start out in minimized form at the bottom of the screen. The default is wsNormal and this property can be changed during runtime. |
Position
| RememberSize | If this is checked (True) the program will remember where the screen is, and its height and width when the screen (form) is closed. Then, the next time the specific program is run, and the screen is displayed, it will be placed in the same location with the same sizes. This can be set at runtime. |
NOTE: If this property is checked in can cause problems if your program is going to use Skins.
NOTE: If you have the AutoResize checked in the object inspector this option should not be checked or used as it could cause problems with your form.
| ScreenPos | This property determines where on your monitor the form will be displayed when it is first loaded. The options are: tpDesigned (leave the form where you designed it), tpDesktopCenter (place the form in the center of the desk top), tpMainFormCenter (place the form in the center of the main form), tpScreenCenter (place the form in the center of your monitor). |
TAS Pro
| Modal_Result | This property is not published, you won't see it in the Object Inspector when you look at the form. However, it is available during runtime through the use of the SET_OBJECT command. If the form is loaded as a modal type (the user can't do anything until the form is closed) you can accomplish that through program code by setting the value of this property to something other than 0. You can also specify the ModalResult property of a TButton. |
| No_Refresh | This property is not published, you won't see it in the Object Inspector when you look at the form. However, it is available during runtime through the use of the SET_OBJECT command. By setting this property to .True. you will speed up your program when it's in the process of lots of calculations. Each time a calculation is completed the program attempts to update the form since something in that expression may effect one of the fields on the form. By setting this property to .True. you tell the form to ignore the update call. Since the slowest part of Windows is updating the screen you will speed up your program considerably. When you're finished, just set this property to .False. Then, the form will update as expected. The default value of this property is .False. |
NOTE: If you have a WLISTF grid active and have changed the current record while the NO_REFRESH was set to .True. then you should return to that previously current record before setting NO_REFRESH to .False. If you don't the current record in the grid will change also.
| OnClose | This label is called just before the form closes. If you call this label you must return .True. or .False. when you return (RET) from the routine. If you return .True. the form will close as expected. If you return .False. the form will not close. This keeps the user from quitting a program before all the entries that are required have been completed. This property can be modified during runtime. |
| OnDisplayScreen | This label is called each time the form is displayed. If it is minimized during runtime and restored this label will be called again. You can eliminate this possibility by clearing out this property during runtime. Then it will only be called once. |
| OnStart | When a program is first run and the first form is loaded, this property is checked. If there is a value here the program will try to call that label. If there is no value in this property, the program will look for a label named START, and will call that, if it exists. |
| OpenFiles | This label is called when the form is first loaded but before the OnStart label. This will allow you to open any files necessary so that all fields are active before any objects that link to those fields are activated. |
| SourceAttached | If this is checked then there is source code attached directly to the screen form. A page in the source code editor will be created when this property is checked, and each time thereafter when the form is edited. Any commands that you would use in a standard program can be added to this source file. You can also test compile the source by clicking on the Compile button or pressing the F9 key. Even though the source code is not saved, the compiler will tell you if you have any problems before you load the screen at runtime. The attached source code is compiled automatically when the form is loaded and acts just like code that was compiled in advance in the program that called this form. |
NOTE: If you want to use the automatic event creation process the program will check for a source file loaded through the SourceFile property below first, then will check for source code here second.
NOTE: If the code has any line labels that duplicate those in the main program, they will be overridden by the new labels. The only way you will be able to call the previous routines is with the use of the INHERITED command.
| SourceFile | If you enter the name of a source file here it is loaded when the screen form is loaded. This will allow you to use the automatic event creation process. If the source file is not in the same subdirectory as the form you must include the proper path. |
COMMENTS
If you decide to put a TPanel on your form after other objects have already been added that you want to move to the panel, you can't just move them to the panel. You can, however, copy it (click on the object, right click and choose copy or press CTL+C) and then paste it on the panel (right click on the panel and choose Paste or CTL+V) and then delete the original object.
EVENTS
Events for a TTASForm are different than any other object. You won't know what the name is until runtime (see Name property above) so you can't use the standard events as they exist in other objects.
When TAS Professional loads a form it first tries to call the OpenFiles label, if it exists. This will make sure that any files that need to be open will be before the objects that relate to them have been activated. Next comes the OnStart or the default START label. The user still hasn't seen the form so if you need to activate a data grid or pre-load any objects you would do so here. Finally, the OnDisplayScreen label is called. This comes last since some objects cannot be accessed until the form is visible on the screen. The OnClose label isn't called until the user closes the form either by clicking on the close button or exiting the program.
NOTE: The labels do not have to be OnClose, OpenFiles, etc. They can be anything you wish as long as the correct label name is used as the property value. Also, don't add the colon (:) that would appear at the end of the label name. This needs to be used in the program only, not here.
Page url: http://www.cassoftware.com/tas/manual/ttasform.htm