|
Converting Data |

  
|
|
Converting Data |
|
Tips on conversion before you get started
The time involved in converting your data depends entirely on what version you're starting with and the size of your data files. It can take from as little as one hour to as much as several days. Most of the process is automated. However, several steps along the way require your intervention, to start a program, select an option, etc. Make sure you have the time to proceed. You may convert as many times as you wish. So, you may choose to convert once for a test and again with live data.
This conversion routine ONLY covers users with Advanced Accounting 5 and above. This does not work for Advanced Accounting 4 or older versions. If you're converting from Advanced Accounting 3 you will need a version of Advanced Accounting 5 and convert to that first. Contact Computer Accounting Solutions (928-257-1236) if that's your situation.
You should run the conversion from the same computer where the data has been installed. Running over the network will add time to the process.
You must have total access to the data that's being converted. No one else should be in the program.
![]() Always backup your data. Even though you will copy your data to another subdirectory, mistakes can sometimes happen. For example, if you forget to change the file locations in Maintain File Locations, the conversion utility could easily work on your live data. In that situation you want to make sure you have a backup copy. If you can't backup to a CD, DVD or tape, copy the current BK*.B* files (all of your data files) to another computer. DO NOT SKIP THIS STEP. There is nothing that CAS support will be able to do for you if you do not have a backup that works.
Always backup your data. Even though you will copy your data to another subdirectory, mistakes can sometimes happen. For example, if you forget to change the file locations in Maintain File Locations, the conversion utility could easily work on your live data. In that situation you want to make sure you have a backup copy. If you can't backup to a CD, DVD or tape, copy the current BK*.B* files (all of your data files) to another computer. DO NOT SKIP THIS STEP. There is nothing that CAS support will be able to do for you if you do not have a backup that works.
![]() **** IMPORTANT ***** You should read through this entire process before starting. Then you will know what's expected and what should happen. Especially if you are running on a Windows 98 or Windows ME system. Step 3 is different for those versions of Windows and require an extra step.
**** IMPORTANT ***** You should read through this entire process before starting. Then you will know what's expected and what should happen. Especially if you are running on a Windows 98 or Windows ME system. Step 3 is different for those versions of Windows and require an extra step.
Converting your Advanced Accounting 5x data
Step 1
Install Advanced Accounting 7 in a clean or new subdirectory such as C:\ADV7\, etc.
Step 2
Normally, when Adv 7 runs, a main menu is displayed. We're going to turn that off and run from the internal menu. Double click on the Adv 7 Setup icon on your computer desktop. The screen below will be displayed:
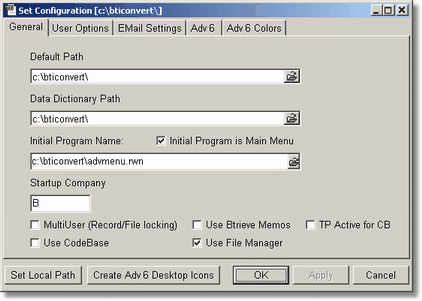
![]() The settings for Default Path, Data Dictionary Path, etc, should match where you have installed Advanced Accounting 7. If they don't, stop now and contact CAS support.
The settings for Default Path, Data Dictionary Path, etc, should match where you have installed Advanced Accounting 7. If they don't, stop now and contact CAS support.
Click on, or tab to, the Initial Program Name field. This should be the path where you installed Adv 7 and the program name ADVMENU.RWN. Double click on the entry field and the program name will disappear. The Initial Program is Main Menu will turn off automatically when you update the settings.
If the MultiUser (Record/File locking) check box is checked then click on that field also to un-check that also.
Click on the OK button to save your changes to disk. Now, when you load Advanced Accounting 7 again the following screen will be displayed:
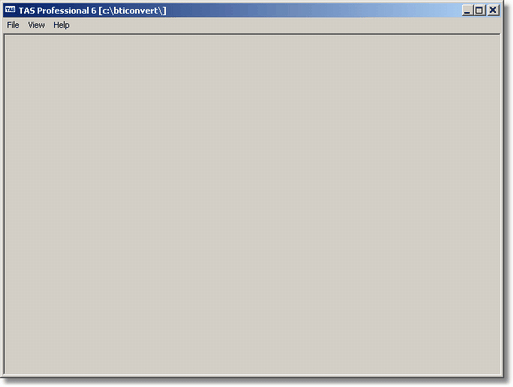
The form will fill your monitor screen. However, it's just like any other Windows form and can be reduced in size, minimized, etc.
Step 3 - Windows 98 and ME only
These versions of Windows do not allow us to copy the files automatically that you need to continue with the conversion process. So you must do the following:
Exit from Advanced Accounting 7.
Double click on My Computer. Double click on the icon representing the drive where you installed Advanced Accounting 7. This will generally be the C drive. Double click again on the Advanced Accounting 7 folder. The first file in the Advanced Accounting 7 folder should be a folder called Conversion. Double click on that.
Within that folder are several files. One of those is named COPYFILES.BAT. Double click on that file. A DOS box should be opened and a total of 16 files should be copied (14+2). This should take just a moment. When this is complete click on the X in the upper right hand corner of the DOS box to close it.
Now click on the X in the upper right hand corner of the My Computer window that you have opened and that should close also.
Double click on the Adv Main Menu icon on your desktop and the screen above should be redisplayed. Your license will be displayed, just click on the Continue button and it will close.
Now you can follow the instructions below for Windows 2000 and XP. HOWEVER, when you choose the program to run you will want to choose ADV6CONVERT0_COPYERR instead of ADV6CONVERT0. This is very important. If you choose the wrong program you will get an error when it attempts to copy the files over.
Step 3 - Windows 2000 and XP only
You need to delete the data that was installed with the demo version of ADV 7 and copy over some other files. A program has been provided to do this for you. Click on the File option in the menu at the top of the screen. Then click on the Run option and the screen below will be displayed:
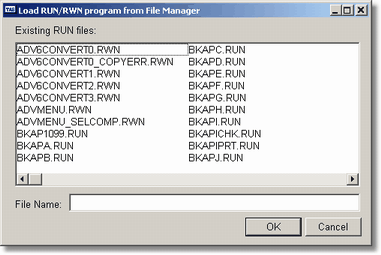
You want to run the first program, ADV6CONVERT0.RWN (If you are running Windows 98 or ME you will want to choose ADV6CONVERT0_COPYERR.RWN instead - YOU MUST DOUBLE CLICK ON THE PROGRAM TO EXECUTE IT). Either double click on the program name or enter the letter A and the program name will appear in the File Name field below, then press the ENTER key (if you double clicked on the program name the program is automatically executed). The screen below will be displayed:
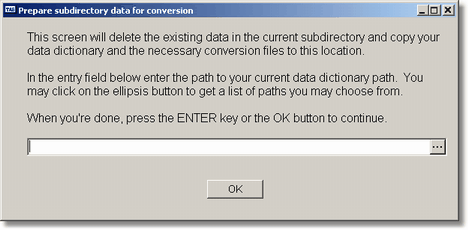
You need to enter the path to the Adv 5x data dictionary in the entry field. You may click on the ellipsis button to get a list of paths and then choose the appropriate one or enter the path directly. After you have entered the path or chosen it from the list, click on the OK button. The appropriate fields will be copied and the dialog box below will be displayed:
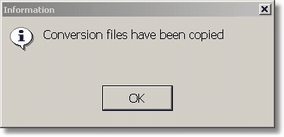
Press the ENTER key or click on the ok button and the next program will be run automatically. You will get a dialog box asking you to wait while files are opened. This will take just a moment. Then the screen below will be displayed:
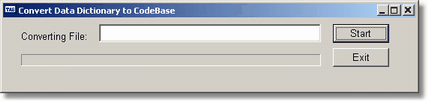
Click on the Start button or press the ENTER key and the data dictionary files will be converted. When the process is complete a dialog box with the word "complete" will be displayed. Press the Enter key and you'll return to the screen above. Press the ENTER key again and you'll chain to the third program in the set, the following screen will display:
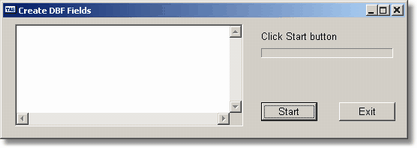
Again, press the ENTER key and the conversion process will continue. The fields from the data dictionary will be displayed, and certain internal processes are working. As above, a complete dialog box will be displayed. Tab to the Exit button and press the ENTER key or click on the button to end this program.
This entire process should take just a few moments to run.
Step 4
The next step is to copy the data to the new subdirectory. From the File -> Run menu screen choose the next program, ADV6CONVERT1.RWN. When you do the following screen will be displayed:
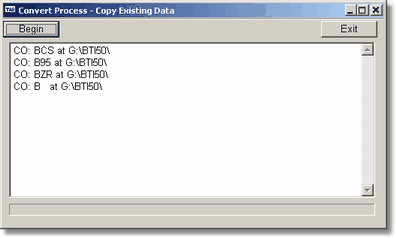
![]() Notice the caption on the form, it should say "Copy Existing Data." If it doesn't you're in the wrong program and should exit immediately.
Notice the caption on the form, it should say "Copy Existing Data." If it doesn't you're in the wrong program and should exit immediately.
This program will check for all of the different companies that you may have data for and will list them on the screen, including locations. When they are copied to the new location a separate subdirectory will be created for each one since all data must now be in separate subdirectories. Each subdirectory will use the company code as the new path. For example, if you install in C:\ADV60 and you have three companies, B, B02, B03 then the program will create two new subdirectories, one will be C:\ADV60\B02\ and C:\ADV60\B03\. The default company, B, will be copied to the main subdirectory, C:\ADV60.
When you click on the Begin button or press the ENTER key the program will create the new subdirectories and copy the files, as appropriate. This process can take some time depending on how big your files are and whether you're copying across the network, etc.
![]() A complete dialog screen will be displayed at the end. Do not interrupt this process, even if it appears that the copying has stopped.
A complete dialog screen will be displayed at the end. Do not interrupt this process, even if it appears that the copying has stopped.
Step 5
The next step is to save out to disk data that we want to read back in after the restructure process in step 7. Choose File -> Run again. From the initial screen double click on the ADV6CONVERT2.RWN program (should be the third one on the screen). The following screen will be displayed:
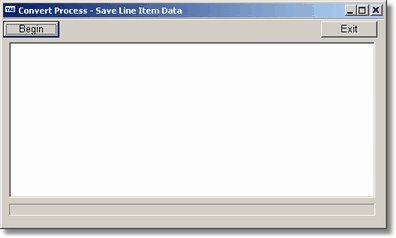
![]() Note the title at the top of the screen "Save Line Item Data." Make sure the screen caption matches this. If it doesn't, you chose the wrong program, exit and try again.
Note the title at the top of the screen "Save Line Item Data." Make sure the screen caption matches this. If it doesn't, you chose the wrong program, exit and try again.
Click on the Begin button, or press the ENTER key. The program will search your data dictionary for certain fields and will determine what needs to be updated.
A list of "things to do" will be displayed. You may have to move the dialog box away from the screen to see the list. It should be similar to that below, depending on the version you're converting:
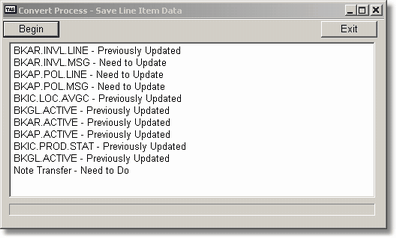
The more that needs to be done, the longer the conversion will take.
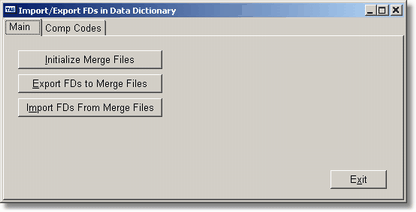
Click on the Yes or press the ENTER key when you're ready to continue. As each file is read it will be displayed on the screen. When the process is done a dialog box will be displayed. When you click on the OK button or press the ENTER key the program will chain to the TAS Merge program:
This is where the major work is done. The program goes through the data dictionary for each and every file and checks to see if there have been any changes. If so, the files are "restructured." Basically, this means the data is exported to a fixed length field, the file is initialized and the records are read back in the new format. Depending on the size of the data files this can take a considerable amount of time. A substantial number of files have been changed due to enlarging the product code from 15 to 25 characters. Also, there are new features everywhere in the system, so approximately 75% of the files in the data dictionary have changed. If you have invoice files (history or current), G/L transaction files, P/O line item files (current or history) that have lots of records (read that 100,000+), this process will take a long time.
![]() You can always start and if it gets too long stop by clicking on the Exit button. Then restart the entire process from the beginning. You cannot start and stop this program.
You can always start and if it gets too long stop by clicking on the Exit button. Then restart the entire process from the beginning. You cannot start and stop this program.
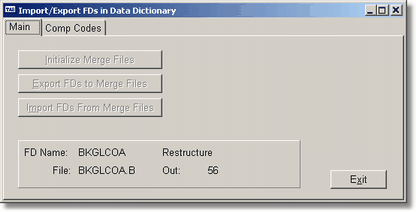
As the restructuring process continues the file that is being worked on will be displayed. The program will count down the number of records being exported and at the end, the count down of the records being saved back to the file. This will happen for all companies at the same time.
To start the restructure click on the Import FDs from Merge Files button. The dialog box below will be displayed. You can ignore this message as long as you have made a backup of your existing data before you started this process. However, in the future you will always want to make a backup of your data before restructuring the file.

Click on the Yes button and the process commences.
The above is typical of what you'll see during the process. When the process is complete the program will return to the original screen. Click on the Exit button and you're ready for the next step.
Step 6
Next, you need to restore some of the data that was saved at the beginning of step 5 above. First exit from the runtime and restart so that the new file structure is used through out the system.
Then from the File -> Run menu option double click on the ADV6CONVERT3.RWN program. The screen below will be displayed:
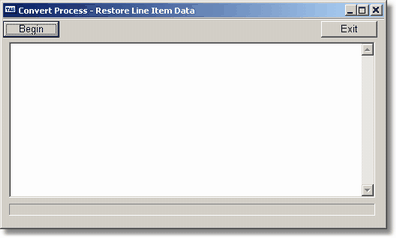
![]() As with the others, note the title at the top of the screen "Restore Line Item Data." Make sure the screen caption matches this. If it doesn't, you chose the wrong program, exit and try again.
As with the others, note the title at the top of the screen "Restore Line Item Data." Make sure the screen caption matches this. If it doesn't, you chose the wrong program, exit and try again.
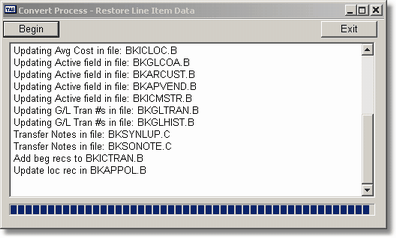
As the restore process continues a line will be displayed for each step. This provides you with a step-by-step history of what's going on if something should fail. When the restore process is complete the program will display another dialog box. This time, it means it. The conversion process is complete.
Step 7
However, you have one more minor step. You need to turn on the main menu again. Execute the setup program just like you did in step 1 above. This time enter the file name in the Initial Program Name field. This should be the same value where it was in the beginning. Next, click on the Initial Program is Main Menu check box so that Advanced Accounting 7 will know this is the main menu. Click on the OK button, the setup program will close and you're done.
![]() You should make a backup of the converted data before doing anything else. This will allow you to return to this step should something minor need to be changed.
You should make a backup of the converted data before doing anything else. This will allow you to return to this step should something minor need to be changed.
![]() If you are running multiple companies and wish to change the location of the data you are free to do so. Just remember, each company data must be in a separate subdirectory.
If you are running multiple companies and wish to change the location of the data you are free to do so. Just remember, each company data must be in a separate subdirectory.
Page url: http://www.cassoftware.com.com/adv7docs/index.html?convertingdata.htm