|
Status Bar Panel Editor |

  
|
|
Status Bar Panel Editor |
|
This editor is displayed when you right click on the TStatusBar and choose the Panels Editor option. This is how you will create the TStatusPanel objects. The following is displayed when you click on the button (the sample below has already had 2 panel items added):
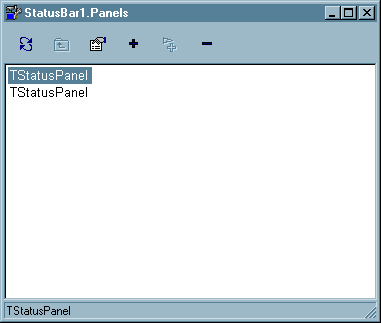
For each item you add, or when you click on the appropriate line, the properties for that menu item will be displayed in the Object Inspector.
ACTIONS
![]() This refreshes the properties for the object. If something you have changed effects other changes, and they don't show up automatically, you can see those by clicking on this option. In general this won't be necessary.
This refreshes the properties for the object. If something you have changed effects other changes, and they don't show up automatically, you can see those by clicking on this option. In general this won't be necessary.
![]() If the properties for the object are not displayed you can bring them to the front by clicking on this icon. Generally, if you click on the window the one of the status panels will be set active and displayed.
If the properties for the object are not displayed you can bring them to the front by clicking on this icon. Generally, if you click on the window the one of the status panels will be set active and displayed.
![]() Click on this icon to add a new status panel. This will always add to the end of the list. If you want to insert a status panel click on the appropriate line and press the INSERT key.
Click on this icon to add a new status panel. This will always add to the end of the list. If you want to insert a status panel click on the appropriate line and press the INSERT key.
![]() To delete a status panel click on the line representing that item and then this icon. You can also just press the DELETE key and get the same result.
To delete a status panel click on the line representing that item and then this icon. You can also just press the DELETE key and get the same result.
NOTE: You can move status panels around by dragging the appropriate line and dropping it where you want.
Page url: http://www.cassoftware.com/tas/manual/statuspaneleditor.htm