|
FL-D - Import File |

  
|
|
FL-D - Import File |
|
Purpose of Program
This option will allow you to choose a file and fields to be imported from 4 different non-TAS file types.
General Program Operation
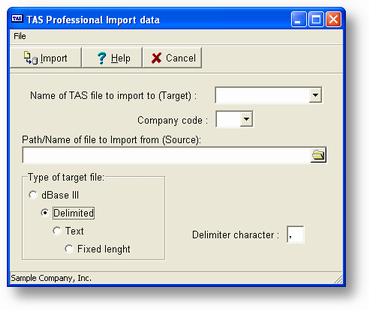
a) Enter the File name and extension of the file you wish to import to. You can get a list of available files and descriptions by clicking the dropdown. The file names are drawn from the subdirectory where your data dictionary is located (usually \ADV7).
c) You are then asked which type of import file. See the list of types in the previous section.
b) After you choose the file the fields within that file are displayed. You may choose all the fields in a file by clicking the All fields button, or you can select individual fields by moving the cursor to the proper line in the choose list and pressing the ENTER key. When a field is chosen, the program asks you to assign a number indicating the order in which it appears in the file from which you are importing; these assigned numbers may or may not mimic the order of the fields in the data dictionary. However, for all file types except delimited, the numbers assigned must run consecutively (no gaps). If you click the All fields button to select all, the fields are numbered in the order in which they appear in the dictionary file. If you are importing from a delimited file (only) you may skip fields in the import file by entering a 0 in the field numbers you assign. The first field in the record is 1. On all other file types, the numbers must run consecutively or the import will not work properly.
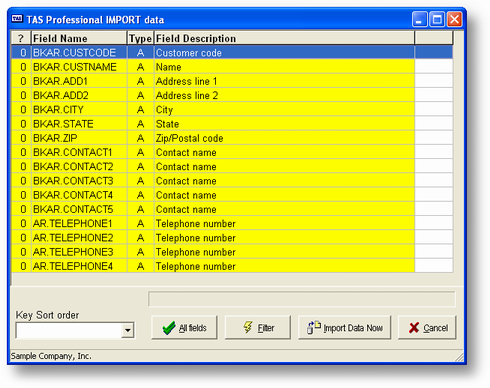
A maximum of 200 fields may be chosen. If you choose an array field you will also be asked to choose which elements. Each element is treated as a separate field. If you choose all fields by pressing the F3 key only the first element of any array will be displayed.
c) Once you have chosen all the appropriate fields press the ESC key. If there is an Owner defined for this file (the file is protected) you will have to enter the password before you will be allowed to access it.
d) Next you may enter a filter expression. See the discussion of filters for more information.
f) And finally the name of the file you wish to import. You can get a list of files on the disk by pressing the F2 key. To limit the listing (a maximum of 250 files may be displayed) enter a skeleton file name before you press the F2 key. For example, to see all the files with the extension LST you would enter *.LST in the export file name entry field and then press the F2 key. Don't forget: you must enter a file name that actually exists before you can start the import process.
g) After you choose a file the records will be imported. A field displaying the current record location in the Advanced Accounting 7 file will be displayed.
h) When the process is complete the program will return to the initial screen. To return to the File Utilities menu, press the ESC key.
Page url: http://www.cassoftware.com.com/adv7docs/index.html?fl_d_importfile.htm