|
General Information: Set Configuration |

  
|
|
General Information: Set Configuration |
|
Run the Set Configuration (TP7SETUP.EXE) program to define the basic system options. TASPRO7.EXE or TASRUNTIME.EXE should not be active while you're running the TP7SETUP.EXE program.
The following picture represents the buttons at the bottom of the Set Configuration program:
![]()
| Set Dev Path | You can create multiple development paths by clicking on this button and defining a new location. For each location the program will place a copy of TASPRO.INI in the path. All information concerning that development path will be saved in this INI file. A single entry is saved in the registry in: |
\HKEY_CURRENT_USER\Software\Computer Accounting Solutions\TAS Pro\DevLoc
The current development path will be saved. Then each time you load TAS Professional it will set the current subdirectory to this path. You can still load screen/report forms and source files in other subdirectories. However, the data dictionary used will be whatever you set in the General page.
When you click this button the following dialog box will be displayed:
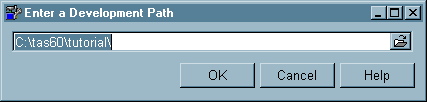
Enter the appropriate path name or click on the ![]() icon to display available paths. After you've chosen a path click on the OK button to save this to the registry.
icon to display available paths. After you've chosen a path click on the OK button to save this to the registry.
If this is a new development path the following dialog will be displayed:

If you answer Yes (click on the Yes button or press the ENTER key), the TASPRO.INI file will be created in your new development path. In most cases this is what you want to happen. However, you can also create a single TASPRO.INI file that will be saved in your Windows System path (\WINDOWS\SYSTEM for Win95,98,ME or \WINNT\SYSTEM\ for NT/Win2000). The downside to this is that you will be able to specify a single data dictionary location for all development paths.
NOTE: If you create a new development path and the create dialog above DOES NOT APPEAR, you have a TASPRO.INI file in your system subdirectory. This would also be the case if you think you're changing your data dictionary path and it doesn't. Go to that subdirectory (as appropriate for Win95-ME or WinNT) and delete the TASPRO.INI file. Then run this Set Configuration program again.
If a data dictionary doesn't exist in the new development path the following dialog will be displayed:

If you answer Yes to this question a basic data dictionary (just the basic FD entries), will be created in the new development path. If you answer No to this you must either copy a data dictionary to this path (the files in the \Datadict subdirectory) or set the Data Dictionary Path in the General page to an existing data dictionary.
| Setup Icons | During the installation process the program will ask if you want to put icons on your desktop. If you answered no and now want them, or you have moved TAS Professional to another computer and didn't re-install, you can create icons by clicking this button. |
| OK | If you have made changes to any of the data on the Set Configuration pages you can save those changes and exit the program by clicking on this button. |
| Apply | If you have made changes to any of the data on the Set Configuration pages this button will become active. If you click on the button the changes will be saved, however, the program will not exit. |
| Cancel | If you click this button any changes you have made to the data on the Set Configuration pages will be ignored and the program will exit. |
Note: Here is a list of the dictionary files that will be copied from the folder in TAS7 named UPGRADE
ERRMSG.DBF
ERRMSG.MDX
FILEDBF.B
FILEDBF.DBF
FILEDBF.MDX
FILEDES.DBF
FILEDES.MDX
FILEDFLD.DBF
FILEDFLD.MDX
FILEDICT.DBF
FILEDICT.MDX
FILEKEY.DBF
FILEKEY.MDX
FILEKNUM.DBF
FILEKNUM.mdx
FILELOC.DBF
FILELOC.MDX
updatedbf.dbf
updatedbf.mdx
WTASFMGR.DBF
WTASFMGR.dbt
WTASFMGR.mdx
Page url: http://www.cassoftware.com/tas/manual/generalinformation2.htm