|
Add File Fields to Screen |

  
|
|
Add File Fields to Screen |
|
Choose this Screen Options menu item to add fields to an existing or new screen form.
MENU ACCESS
Screen Options -> Add File Fields to Screen
MAIN SCREEN
When you first choose this option the following screen is displayed:

Either enter a FD name, or click on the drop down arrow to display all of the FDs available.
If you wish to place all of the fields of the FD on the screen then click on the All Fields button. Otherwise, click on the Choose Fields button and the following will be displayed:
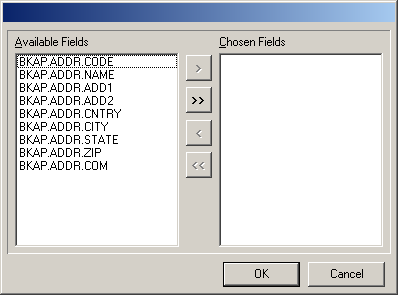
You must choose the fields you want to be added to the screen form. You can choose all the fields by clicking on the ![]() button. Or, click on a field and then click the
button. Or, click on a field and then click the ![]() button. Each time you click on either button fields or a field will move to the Chosen Fields list. Only the fields in the Chosen Fields list will be added to the screen. You can move chosen fields back to the Available Fields list by clicking
button. Each time you click on either button fields or a field will move to the Chosen Fields list. Only the fields in the Chosen Fields list will be added to the screen. You can move chosen fields back to the Available Fields list by clicking ![]() (a single chosen field) or
(a single chosen field) or ![]() (all fields in Chosen Field list). You can also reorder fields in the Chosen Field list by dragging and dropping them within the Chosen Field list. The order they appear in the Chosen Field list will be the same order they are added on the screen form.
(all fields in Chosen Field list). You can also reorder fields in the Chosen Field list by dragging and dropping them within the Chosen Field list. The order they appear in the Chosen Field list will be the same order they are added on the screen form.
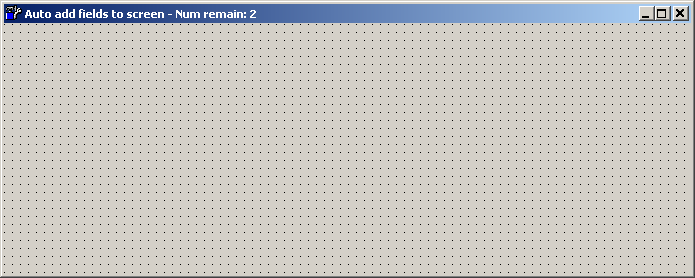
When you click on the OK button you will be returned to the screen form. Notice the message that has taken the place of the original Caption for the screen form. This will tell you how many fields you have remaining to place on the form.
To place a single field on the form move the cursor to the approximate position where you would like to place that field and click the left mouse button. If you are adding an A type field something like the following will appear:
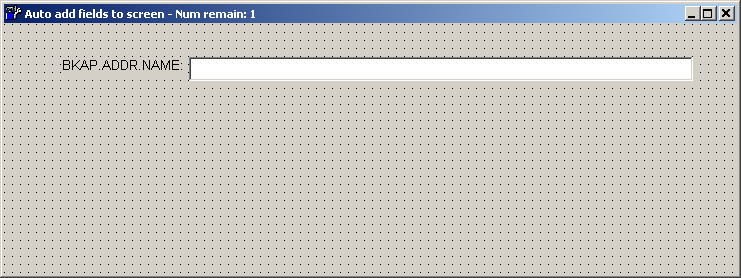
The name of the field is placed in a TLabel immediately before the object, in this case a TTASEnter. All of the information that can be setup for that object, including the FieldName, CharCase and Width has been done. Also notice that the number of fields remaining will decrease by one.
Keep placing fields in this manner until all have been put on the screen. The original caption will be replaced and you'll know you're done.
NOTE: Place All Fields At Once - If you don't want to place individual fields you can place them all at one time by moving the mouse to the starting position and clicking on the right mouse button. This will place each field on the screen one after another with the labels lined up on their left sides. You can then move the objects to where ever you wish.
Page url: http://www.cassoftware.com/tas/manual/addfilefieldstoscreen.htm