|
FL-A - Maintain Database |

  
|
|
FL-A - Maintain Database |
|
Purpose of Program
This file utility program allows you direct access to the data in your Advanced Accounting files. You can call up data for observation or modification.
Your Advanced Accounting 7 data is stored in various files, sometimes we'll use the term database. These files are organized along functional lines. For example, there is a Customer master file (BKARCUST), which contains only customer data, such as name, address, etc. There are separate files for Vendors (BKAPVEND), Inventory (BKICMSTR), and G/L Chart of Accounts (BKGLCOA). The Detail Trial Balance is in BKGLTRAN. You will be able to select here which file (type of data) to access.
The information stored in each file is organized into records. For example, in the Customer master file, each customer has its own record. Think of the Customer master file as a printed list of your customers, with each line of that list having information for just one customer. Each record in the Customer file would then correspond to a single line on your printed list.
When you use the Database Maintenance Utility, the information contained in the file you are accessing will be displayed on screen, one record at a time. In the case of the Customer file, you would be accessing entries for a single customer at a time.
Database records are further broken down into fields. Each field contains a portion of information, or a part of the whole record. For example, each Customer record has a field for the customer's name, one for the street address, one for the city, etc.
General Program Operations
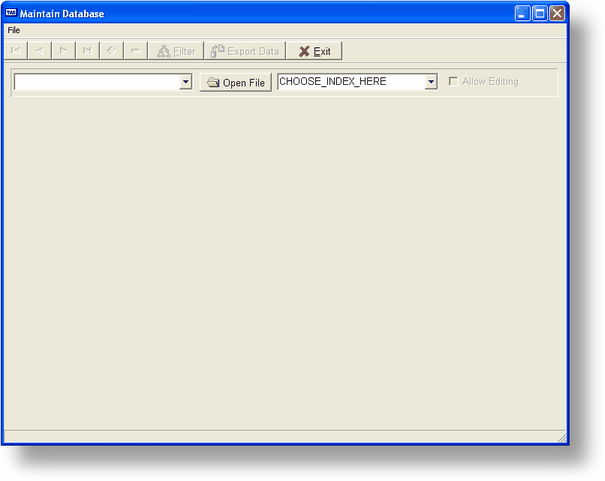
When you execute this program the screen above will be displayed.
![]()
Choose your file here first - Enter the name of the file you want to edit. You can click on the drop down arrow to get a list of current files. You can also enter the first character or part of the file name and the drop down list will start with the name that matches.
![]() You must enter the extension or company code of the file also. So, for example, the default company code of B, opening the customer file (BKARCUST) you would enter BKARCUST.B.
You must enter the extension or company code of the file also. So, for example, the default company code of B, opening the customer file (BKARCUST) you would enter BKARCUST.B.
![]()
Open File Button - Once you have chosen a file click on this button to open it. Once the file is opened you can click on the button to close it. If you want to edit another file you have to close the current file before you can open another one.
After you click on the Open File button the following screen will be displayed:
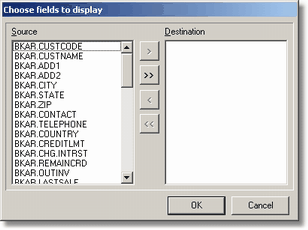
The fields in the list on the left will change depending on the file you opened.
You must choose the fields you want to be displayed in the grid. The buttons between the two list boxes can be used to choose the fields.
| Will move all the fields from the Source list to the Destination list. |
![]() Will move a single field name that has been selected in the Source list to the Destination list. You can accomplish the same thing by double clicking on the field name.
Will move a single field name that has been selected in the Source list to the Destination list. You can accomplish the same thing by double clicking on the field name.
| Will move a single field name that has been selected in the Destination list back to the Source list. You can accomplish the same thing by double clicking on the field name in the Destination list. |
![]() Will move all of the fields in the Destination list back to the Source list.
Will move all of the fields in the Destination list back to the Source list.
The order of the field names in the Destination list will match the arrangement of the columns in the grid. To move fields around just click and hold the field name and move it up or down in the list.
If you don't want to select any fields, or you chose the file by mistake, just click on the Cancel button and you'll return to the original screen.
![]()
Index drop box (Choose your index here) - Once the grid is displayed you can change the current index by clicking on the drop down arrow and choosing a different value. The first field in that index will be displayed as the first field in the grid and the order will change as appropriate.
![]()
Allow Editing - Once the file is open you may click on this check box and edit the record fields. Once you do this the records are automatically locked (assuming you are running in a multi-user mode) when the cursor moves to the row and stay locked until the cursor moves to another row.
![]()
Navigator Bar - A standard navigator bar is at the bottom of the grid. The keys, from left to right, are explained as follows:
Move to first record in file.
Move to previous record in file.
Move to next record in file.
Move to last record in file.
Add a new record.
Delete current record (or press the DEL key).
Save any changes made to current record. The record is saved if you move to the next or previous row also.
Restore record from disk.
![]()
Exit Button - Exit from the program.
![]()
Status Bar - There is a status bar at the bottom of the screen that displays the path and name of the file you are editing.
![]()
Close File Button - What was originally the Open File Button is now the Close File Button. To close the currently opened file and choose another click on this button.
Filter - You can enter a filter expression to control which records are displayed once the file is open and the grid is active. To do this click the filter button. The entry screen below will be displayed. You can enter any expression as long as it uses fields currently active and evaluates to True or False. Be sure to click on the OK button after you have entered the expression. To turn the filter off, click the filter button again, clear the expression (so that the field is blank) and press the Ok button.
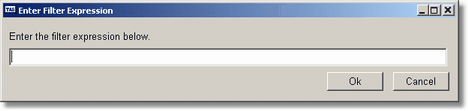
Regardless of when the filter is changed the records on the screen will reflect the filter entered.
Movement - You can move from column to column by pressing the ENTER key or clicking on the appropriate column or row. If you change rows and you have made changes to one or more of the columns in that row the program will ask you to confirm saving that record. If you enter No the record will be refreshed and the changes will be lost. Also, if you move to a new row the program will ask if you wish to create a new record. If you answer No the cursor will remain on the last row.
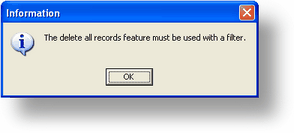
Delete All Records (Must be Filtered)
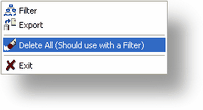
This Menu option is only displayed when you Edit data is checked also if you do not use a filter to filter the viewed record the program will display this message.
If you do have a valid filter the program will ask you if you are sure you want to delete all the filtered records. Only the filtered records will be deleted from the table. This is a permanent deletion of the records and without a backup of the data the data can not be recovered.
![]() You should be very careful about using Maintain Database (MDB) for making random changes to your data. Many of the files are interconnected in Advanced Accounting 7 and changes made to one file that haven't been reflected in another could cause your General Ledger to be out of balance, may make certain records unable to be found, or worse. However, the program has a great usefulness, especially if you're talking to support and certain information is needed.
You should be very careful about using Maintain Database (MDB) for making random changes to your data. Many of the files are interconnected in Advanced Accounting 7 and changes made to one file that haven't been reflected in another could cause your General Ledger to be out of balance, may make certain records unable to be found, or worse. However, the program has a great usefulness, especially if you're talking to support and certain information is needed.
![]() Maintain Database has a special feature that remembers where the form was when the program was closed and what the form size was. When you run the program the next time the form will appear in the same location and at the same size.
Maintain Database has a special feature that remembers where the form was when the program was closed and what the form size was. When you run the program the next time the form will appear in the same location and at the same size.
Page url: http://www.cassoftware.com.com/adv7docs/index.html?fl_a_maintaindatabase.htm