The Structure of Advanced Accounting 7 Modules and Programs
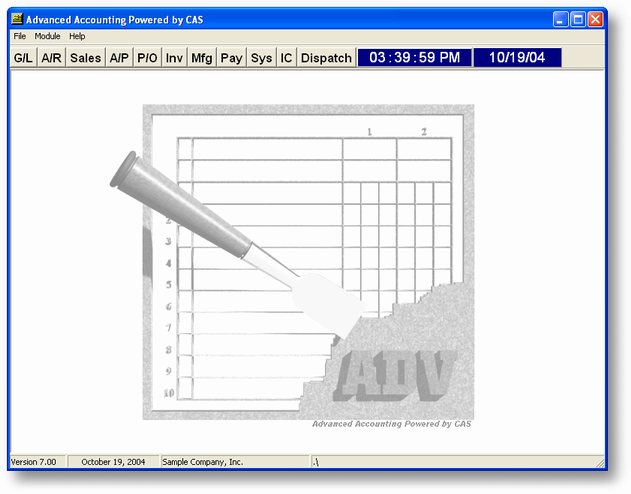
After you have clicked on the Advanced Accounting 7 icon in your Advanced Accounting for Windows program group, you will see the main menu, illustrated below. To bring up a specific menu click on the appropriate button at the top of the screen..

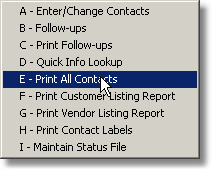
Some of the menus, Sales, Mfg and Sys have sub-menus. When you move the cursor over the menu choices the submenus are displayed automatically. To run the program move the mouse to the appropriate menu item and click on it.


You can also choose menu items from the key board. To choose that same option (SC-E) you would press the @S (Alt+S) key which would display the three option menu. Then press the A key which would display the submenu, then E for SC-E.
![]() If you have TAS Professional 7 or the Advanced Accounting 7 Screen/Report Editor you can assign a function key to that menu option (must be in the Main Menu). So, if it's something you use often, rather than having to choose the menu then the submenu, you can just press the assigned key.
If you have TAS Professional 7 or the Advanced Accounting 7 Screen/Report Editor you can assign a function key to that menu option (must be in the Main Menu). So, if it's something you use often, rather than having to choose the menu then the submenu, you can just press the assigned key.
For example: In the standard Advanced Accounting 7 we assign the following:
F2 to AR-A Enter/Change Customers
F3 to AP-A - Enter/Change Vendors
F4 to SO-A - Enter/Change Sales Orders
F5 to PO-A - Enter/Change Purchase Orders
F6 to IC-A - Enter/Change Inventory
F7 to POS-A - Run POS Register
The only keys that are restricted are F1, @F11 and @F12 (Alt+key).
From the Main Menu if you press the @F11 (Alt+F11) key the program will switch from the Main Menu to the first active program. Then you can switch from program to program by continuing to press the @F11 key.
![]() You can change the picture that shows up in the center of the menu. Just create your own BMP file and save it in the same subdirectory where you installed Advanced Accounting 7. It must be named ADVLOGOBW.BMP.
You can change the picture that shows up in the center of the menu. Just create your own BMP file and save it in the same subdirectory where you installed Advanced Accounting 7. It must be named ADVLOGOBW.BMP.
Page url: http://www.cassoftware.com.com/adv7docs/index.html?gettingaroundinadvancedacc.htm